Index
Right-click on the Listary tray icon and go to Options -> File Search -> Index
What is Index?
Listary has an advanced disk search engine, and its indexing mechanism is the foundation for providing quick and accurate search services.
The index scope defines the search scope of Listary. If you consider your computer a book, the index is like the book's table of contents, which helps you quickly locate your desired content.
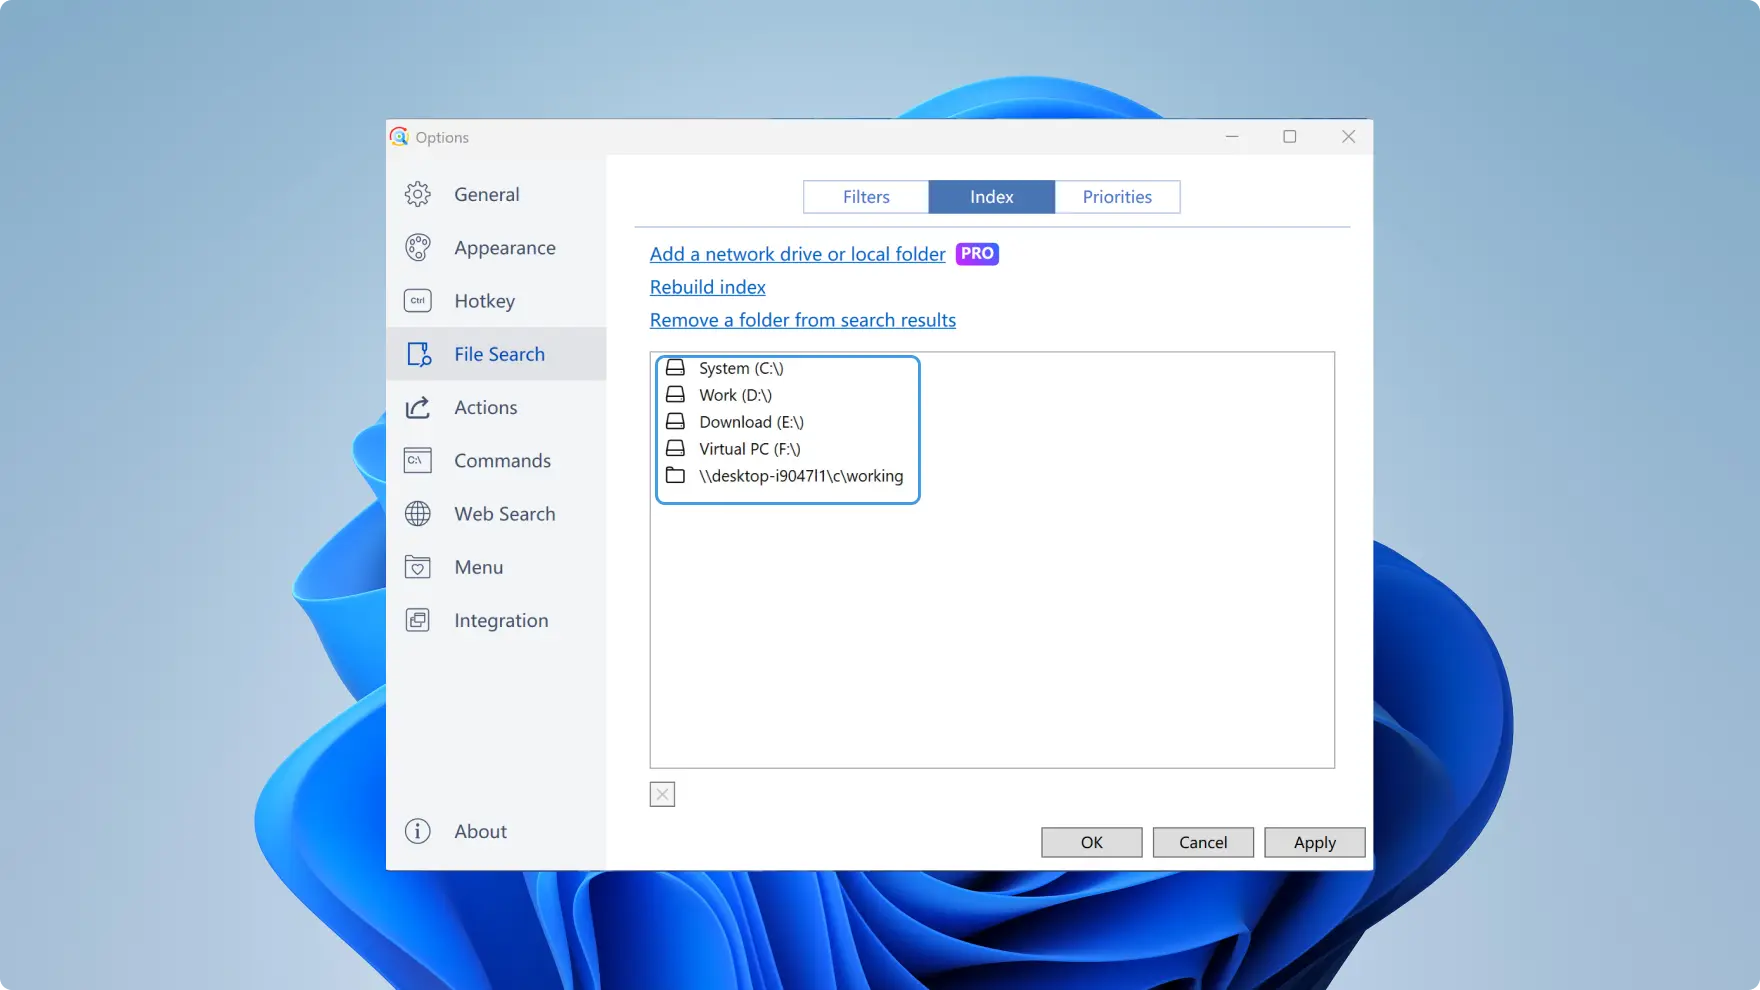
Listary's indexing scope
By default, Listary automatically indexes all NTFS partitions on your local disk.
You can check the current indexing scope here:
How to Add an Index
Listary supports searching files from the following locations:
| File Source | Example | How to Set Up | Real-time Indexing |
|---|---|---|---|
| Local Files | NTFS Drive | No setup required | Supported |
| Non-NTFS Drive | Manually add the index | Depends | |
| Cloud Storage / Cloud Drives | Install cloud client and sync files locally before using Listary to search. | ||
| Onedrive | No setup required | Supported | |
| Google Drive | Stream files: manually add the index Mirror files: no setup required | Supported | |
| Dropbox | No setup required | Supported | |
| Network Drives | Personal/Team NAS | Manually add the index | Depends |
| Team Shared Folders | Manually add the index | Depends | |
| Portable Storage Devices (USB, External Drives) | NTFS Format | No setup required | Supported |
| Non-NTFS Format | Manually add the index | Depends | |
For non-NTFS partitions or network drives that can be opened with the Windows File Explorer, you can manually add them to the indexing list.
Please follow the steps below:
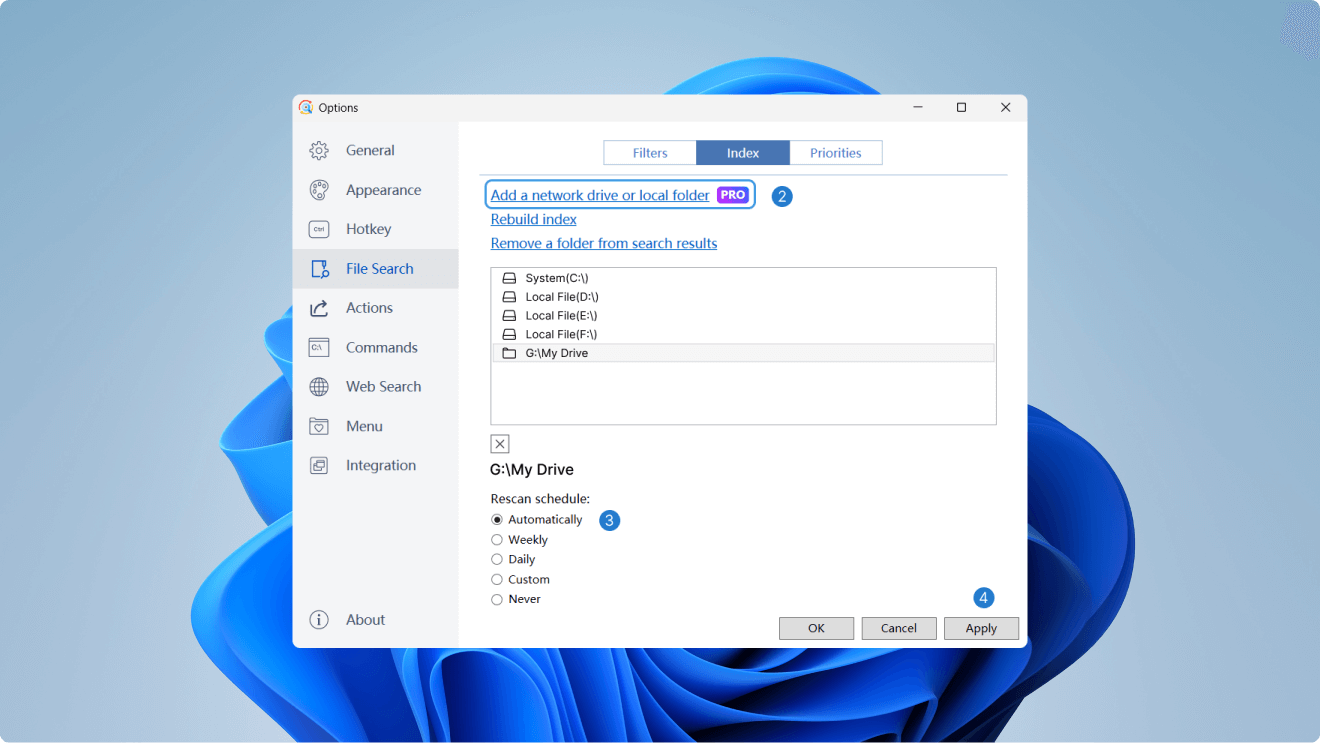
Right-click the Listary tray icon in the bottom-right corner of your desktop, then go to Options > File Search > Index.
Click “Add a network drive or local folder”, then select the file path you want to index (e.g.,
R:). This allows Listary to search all files under that path.Set a rescan schedule
Choose a suitable indexing rescan interval, such as automatic or a fixed time to keep the index up to date.
“Automatically” (Recommended): Listary monitors file changes in real time, refreshing the index as soon as files are added, removed, or modified. Whether real-time updates are truly available depends on the path’s file system / protocol (local NTFS drives and most SMB shares typically support real-time indexing).
You can test it using the method below:Select “Automatically” and click “Apply” to save the settings.
Add a new file and check whether the “Last updated” time and the number of indexed files update.
If the index updates instantly, it means the “Automatically” mode is supported and you can safely leave it enabled. Otherwise, switch to a scheduled scan to make sure the index stays up to date.
“Never”: Index is created during initial setup and never updated automatically.
Click “Apply” to save the settings.
If you only want to index a specific folder on an NTFS drive, simply add that folder in the same panel, then select the original whole-drive entry and click the ✖️ button in the lower-left corner to remove it. Listary will then scan only the path you specified.
Listary can index local files in about 1-2 minutes.
Network files might take longer due to the amount of content and network speed. It's best to index only important content and avoid unnecessary system files.
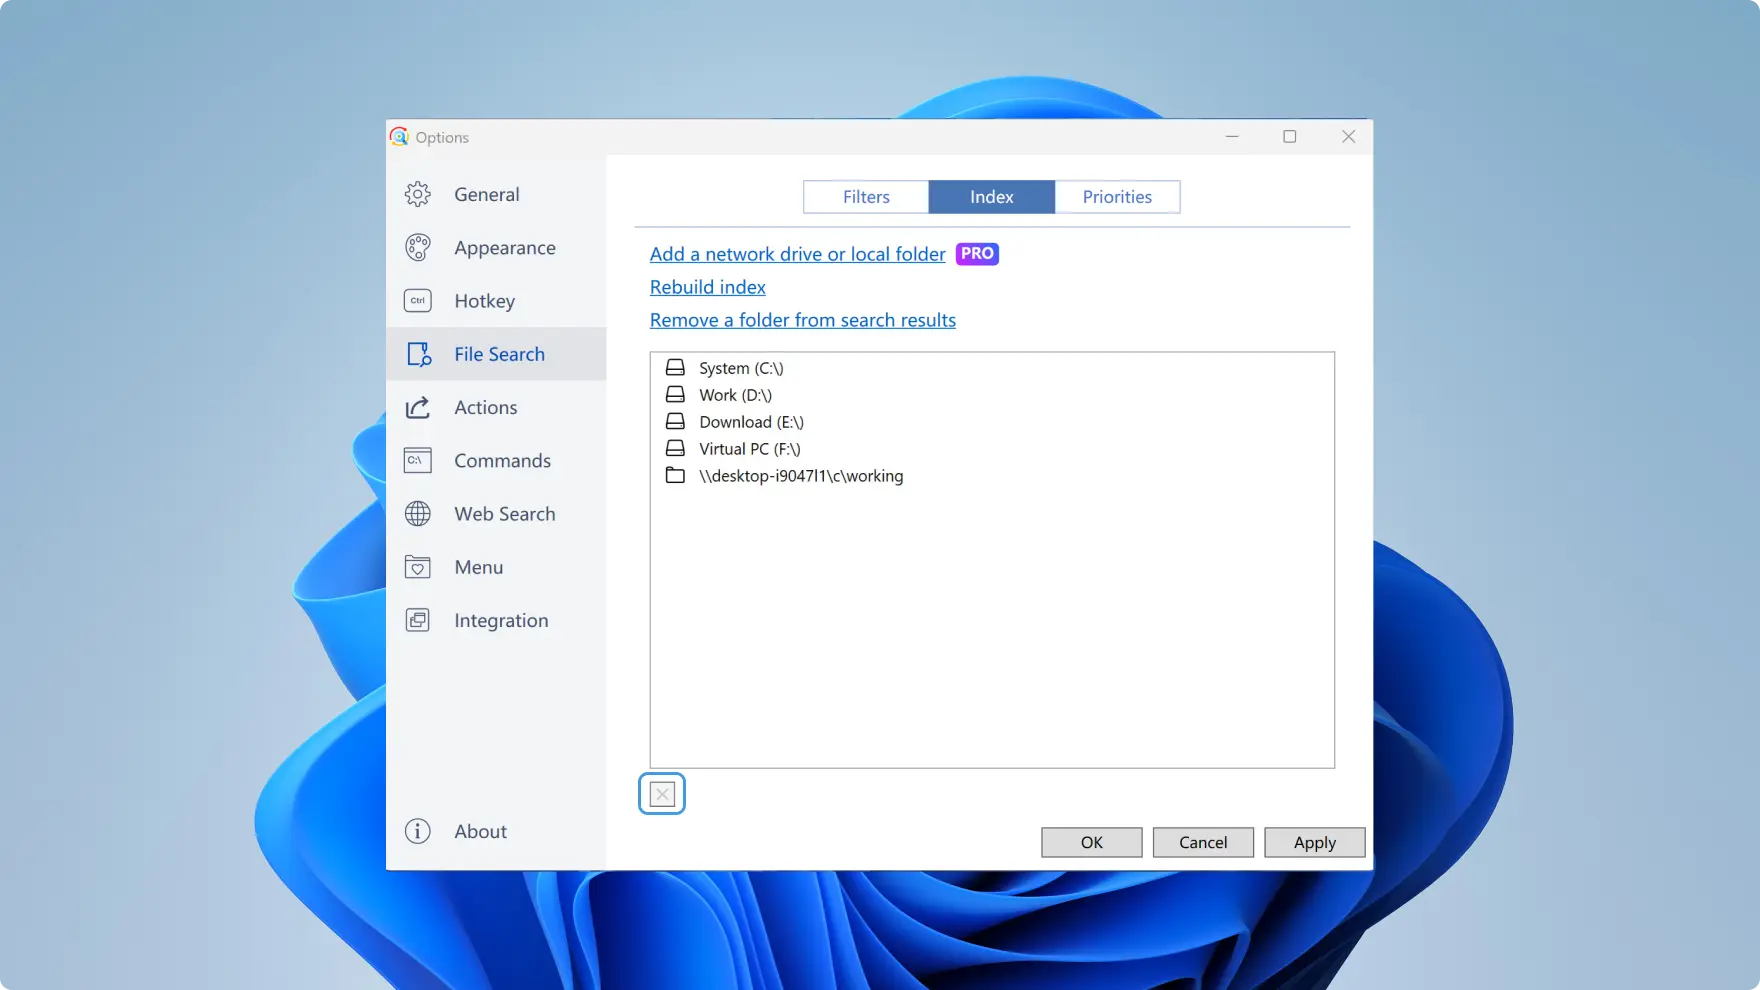
Remove an index
Select the corresponding item in the list and click ✖️ to remove an index.
Rebuild index
The indexing mechanism of Listary effectively guarantees the normal operation of the search function, so you don't need to worry about the index option.
However, the indexing mechanism might fail in rare cases, causing Listary to not search for files properly or produce unusual search results. If you encounter such issues, click the "Rebuild Index" button to attempt to resolve the problem.
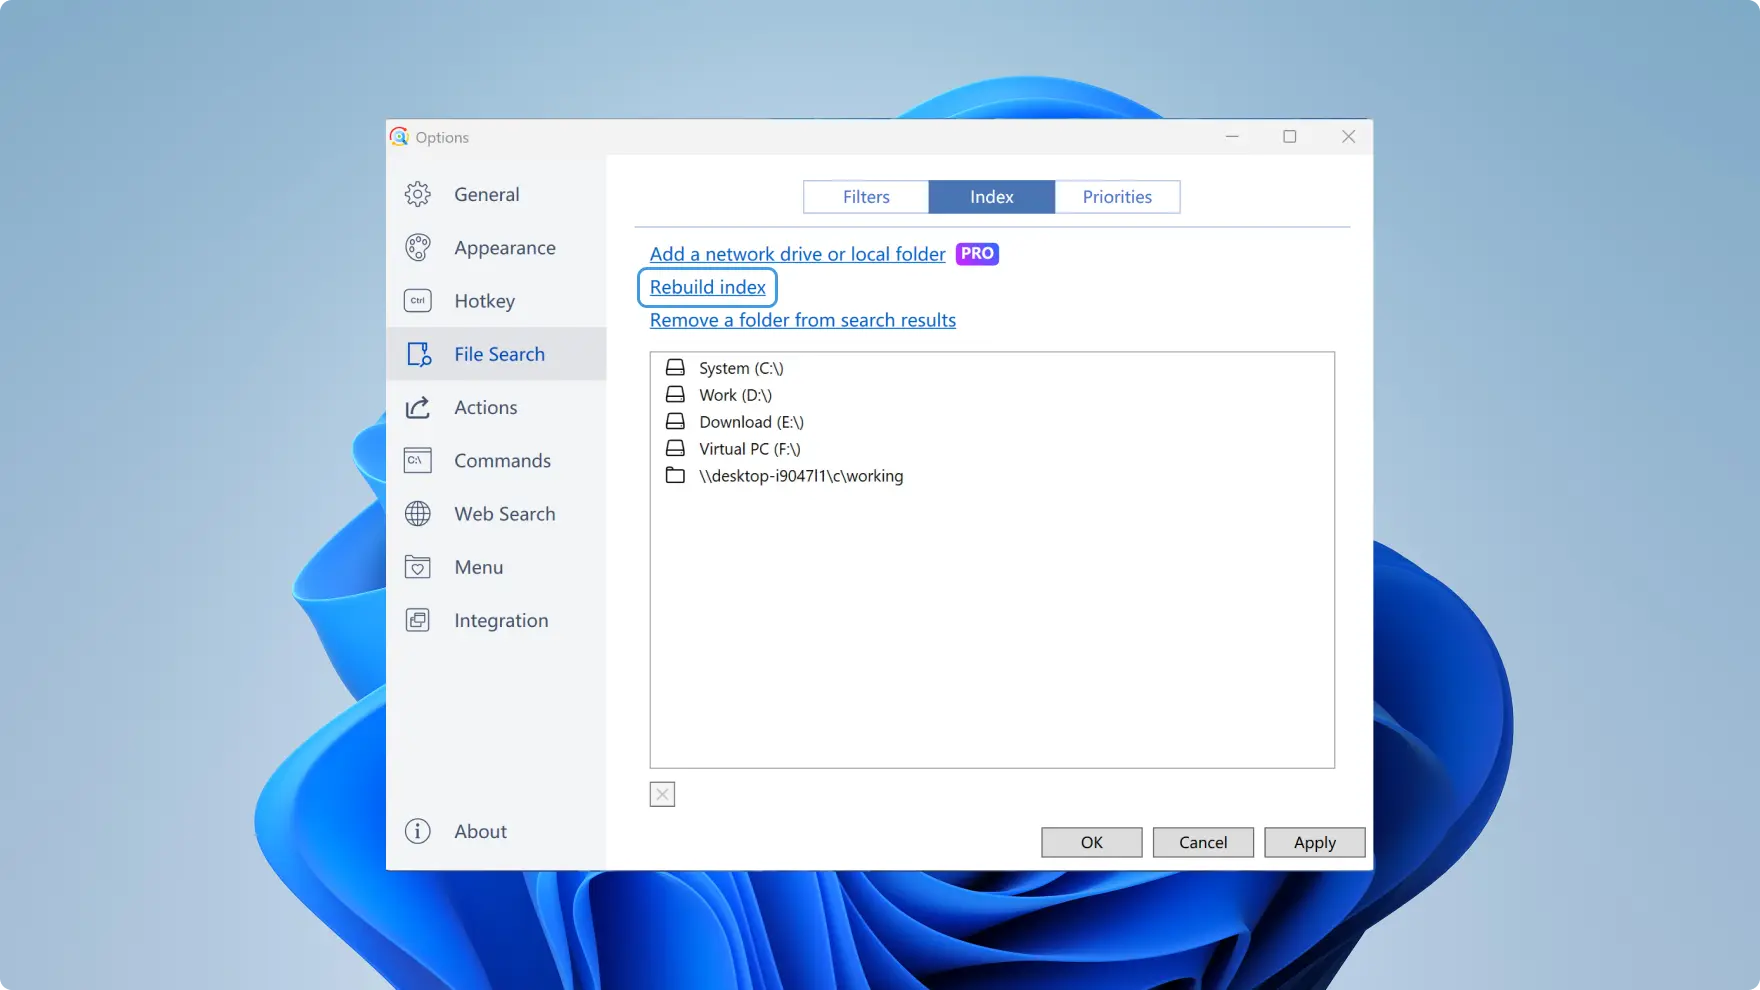
Do not rebuild the index in Listary unless you encounter problems.
Remove a folder from the search results
It is achieved by setting the ignore priority. For specific instructions, please refer to the Priorities.
